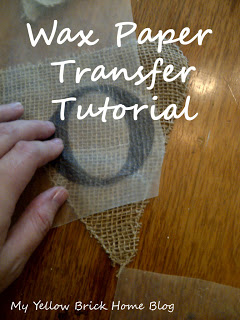
 Ever wonder how you can make your own burlap banner?
While browsing through ETSY I often see such amazing creations…but they cost a fortune.
This tutorial from brickhomelove.blogspot.ca makes it all seem so simple to make your own. Love it!
First, just cut several triangles from some burlap fabric.
Once you have your burlap triangles, here are the steps from brickhomelove.blogspot.ca:
-
Use a word processing program on your computer to create the letters that you want to print ( I used Microsoft Word).
-
Load sheets of wax paper rather then regular paper in your printer. I just tore sheets off of the roll making sure they were the same size or a bit smaller than a regular sheet of paper so they wouldn’t get jammed. This was probably the trickiest part because my printer didn’t recognize the wax paper and thought that it was out of paper. It took some patience and me guiding the wax paper into the printer very carefully, but once I got the hang of it, it went a lot quicker.
-
In your printer settings, switch to mirror image so that the letters print backwards.
- Print your letters onto the wax paper. The ink doesn’t absorb into the wax and stays very wet.
- Place the wax paper (ink side down) right onto the fabric exactly where you want the letter to be and rub gently with your fingers.
- Remove wax paper and your transfer is complete.
NOTE: Since I used regular printer ink, this fabric will not be washable. If I wash it, all of the ink will come out. I am alright with it for this project but I wouldn’t want to use this method to transfer onto clothing or something that needs frequent washing.
After I had the letters transferred onto each burlap triangle, I sewed them (zig-zag stich) onto a piece of twine to attach them in a line.


Leave a Reply